Documentation for Windows
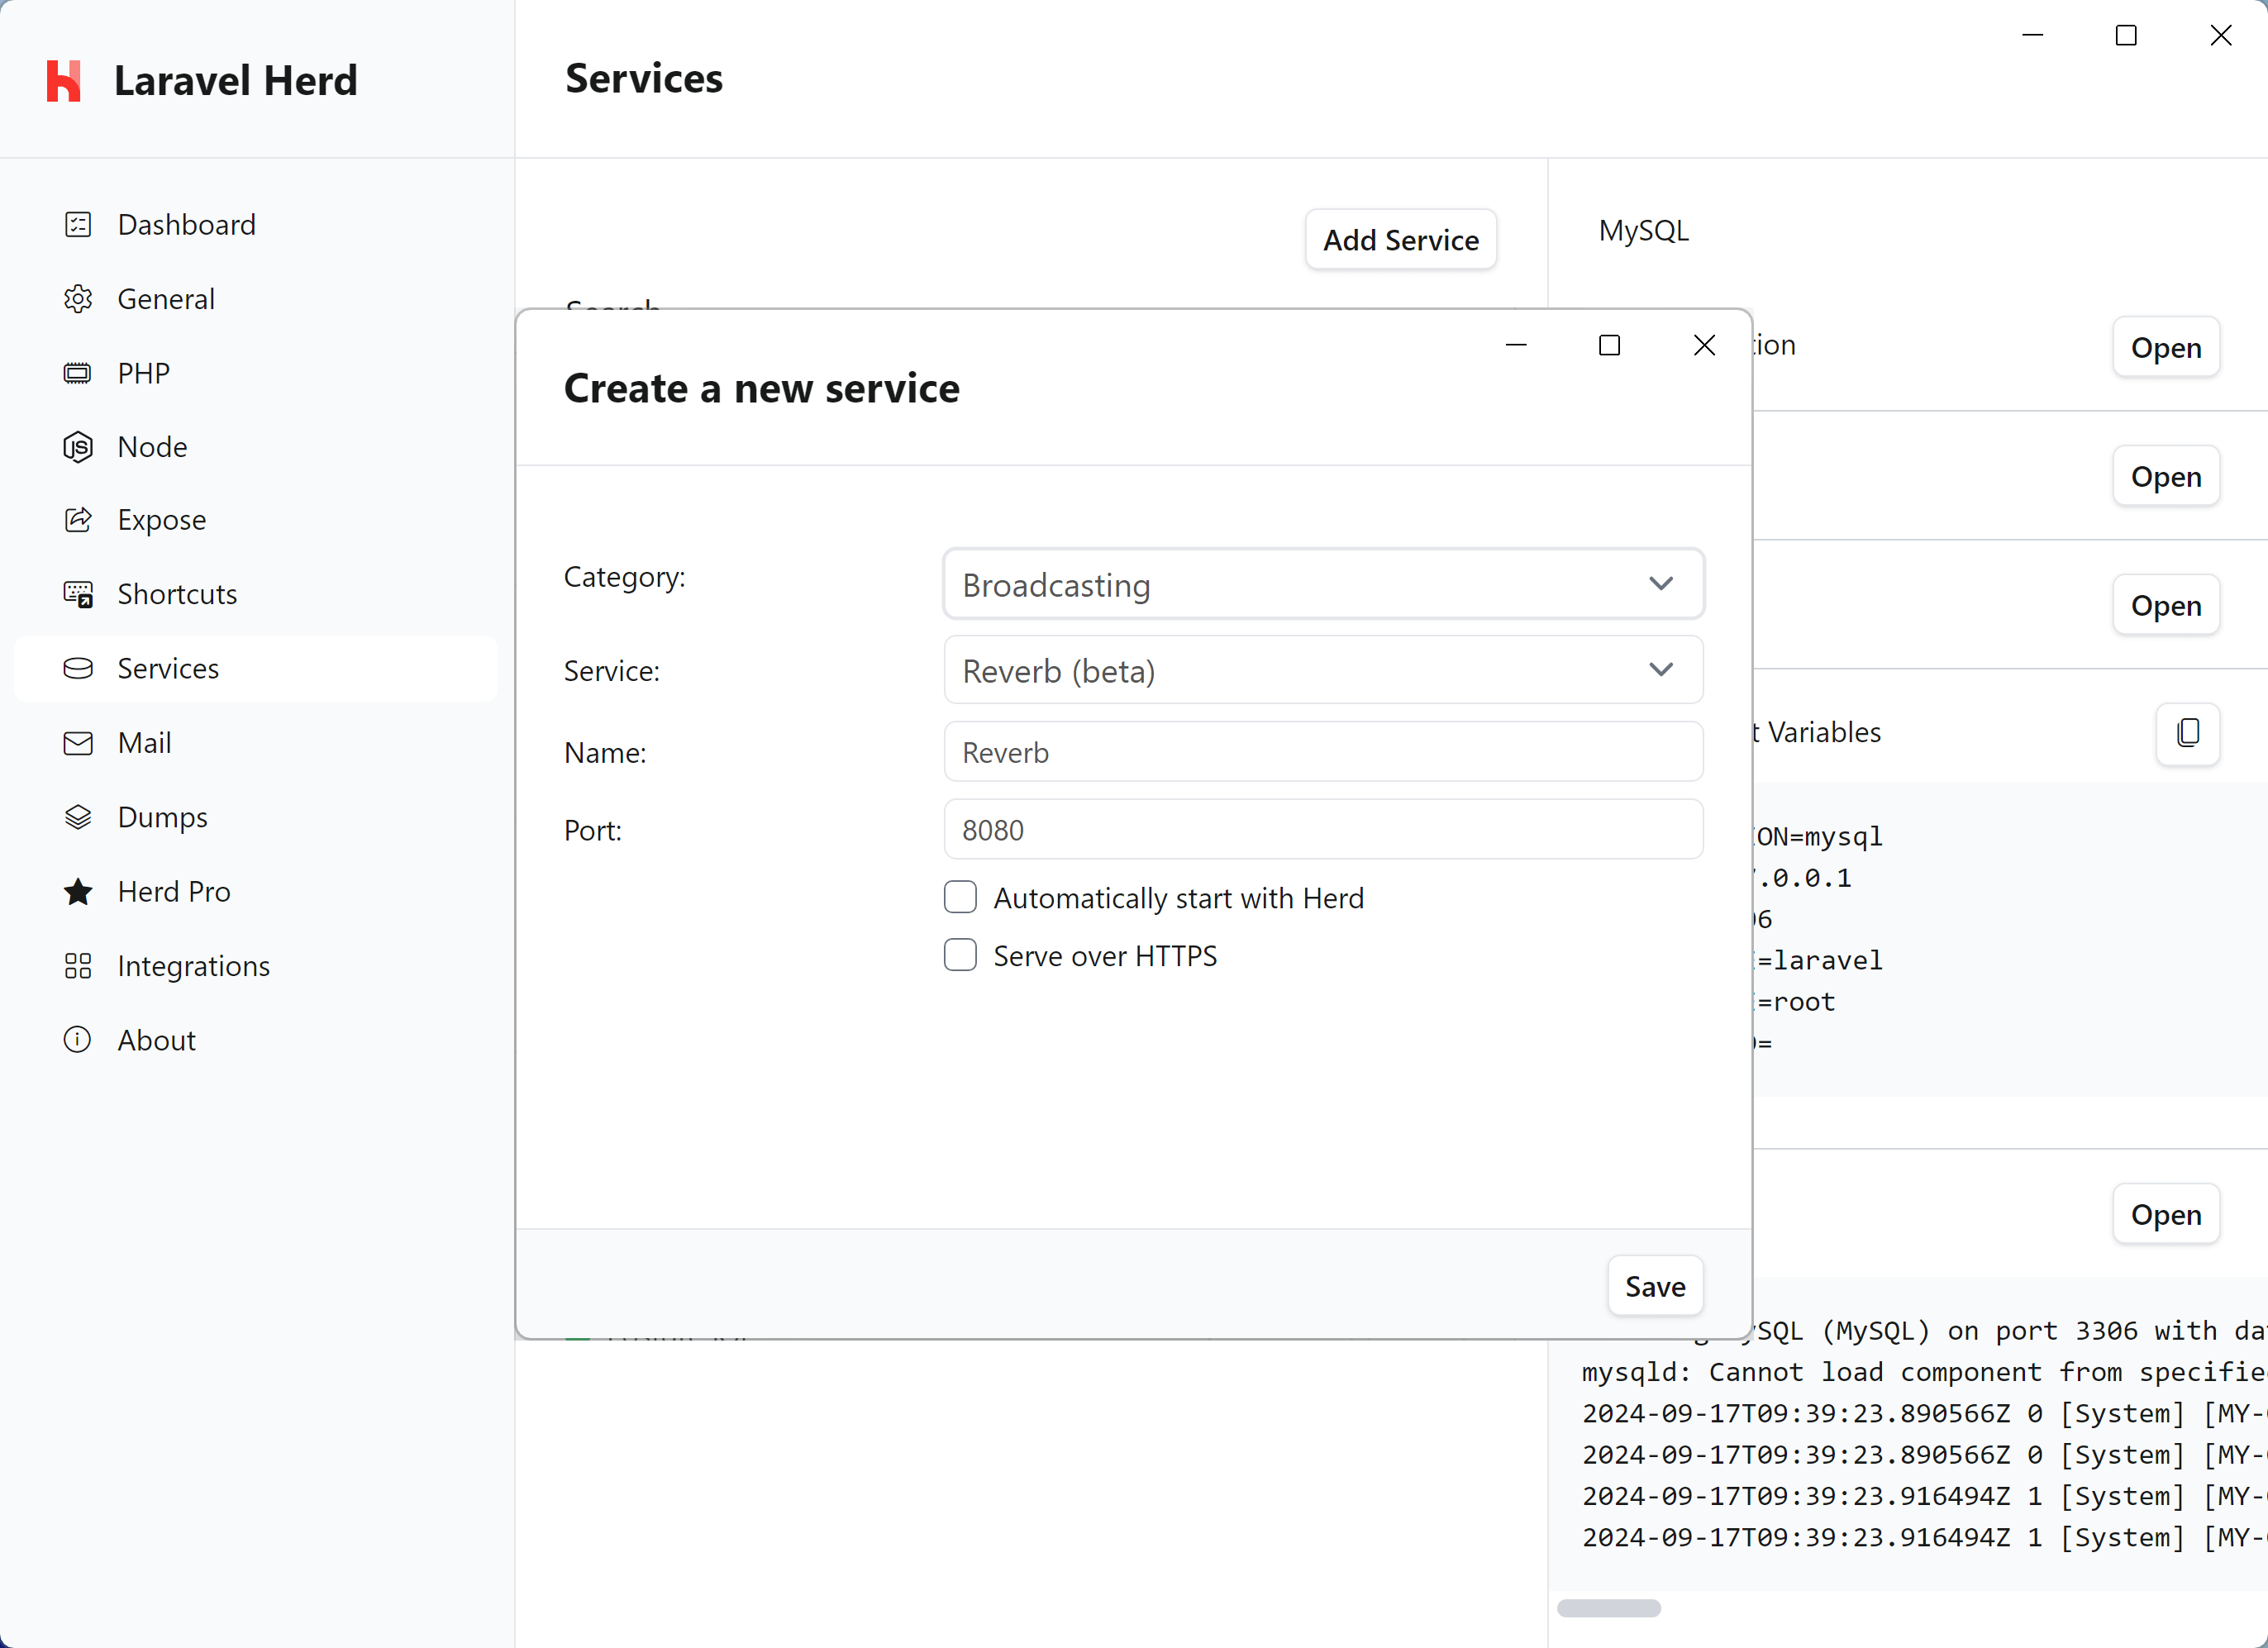
#Setting up a Laravel Reverb instance
Laravel Reverb is a first-party WebSocket server for Laravel applications. It's open source and uses the Pusher protocol, making it the first choice for real-time communication between client and server in Laravel applications. If you want to learn more about Reverb, check out Real-time games with Laravel on Laracasts.
While you can install it as a package into your existing application, it often makes sense to have a dedicated WebSocket server for all your applications.
Herd provides a convenient way to set up a dedicated Reverb instance on your machine with a few clicks. It even comes secured with an optional TLS certificate.
#Connecting from your Laravel application
Laravel Reverb starts the WebSocket server on port 8080 but you can change it when creating a new service in case you're already running a different service on that port or want to run multiple instances in parallel.
After installing Reverb, you can use the following environment variables to configure the service for your application.
REVERB_APP_ID=1001REVERB_APP_KEY=laravel-herdREVERB_APP_SECRET=secretREVERB_HOST="0.0.0.0"REVERB_PORT=8080Check out the Laravel Echo documentation to learn how to connect your application frontend to the Laravel Reverb server.
#Logs
Reverb constantly logs information to the running process, so if you are debugging Reverb connection,s you can open the output of the Reverb process by pressing the Open button in the logs area on the right side.

#Updates
Reverb uses composer and Herd supports updating Reverb to it's latest version via the Herd UI. Simply right click to open the context menu and select "update".